![]()
Tying Tying Instructions
 |
 |
 |
 |
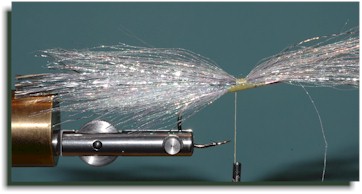
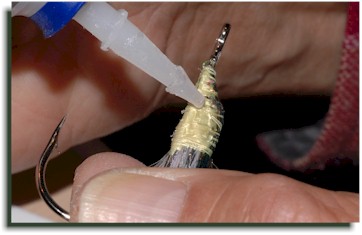
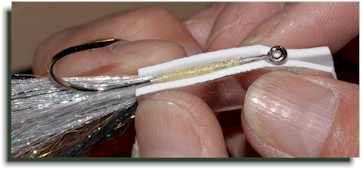
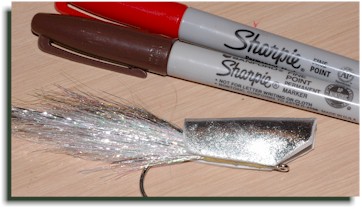
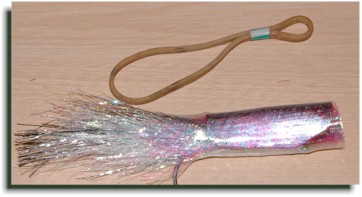
Tying Sequence 1.
To tie the tail, put an Owner Spinnerbait 3/0 or equivalent hook in your vice. The sequence of building from bottom to top is pearl Polarflash (or a mixture of pearl Mylar and fine silver Flashabou), silver Flashabou (flashtail), more pearl Polarflash, a shoulder of mixed brown Super Hair or Slinky Fiber, 5 strands of mixed color Krystal Flash doubled back and a final light topping of Rainbow Angel Hair. Feather the ends of all the materials, except the flashtail that should be left square about 1/4 inch longer than the others. The tail is tapered to the rear. All materials are doubled back. Use plenty of good head cement between materials (I use Goop thinned with Xylene). Before the head cement completely dries, squeeze your tie with smooth flat jaw pliers and fan the tail vertically.
 |
  |
 |
 |
 |
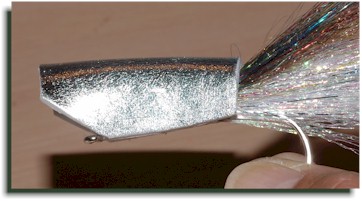 |
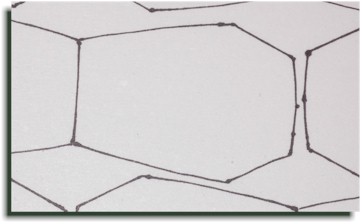
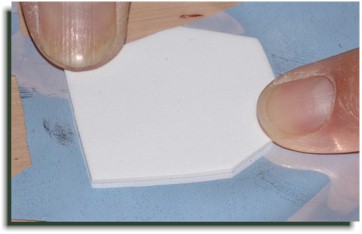
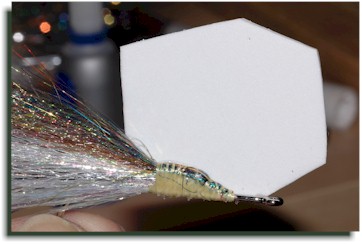
Tying Sequence 2.
To prepare the foam head, use the head template provided. Cut out your head from white 2 mm sticky backed craft foam. Peel the protective coating from the sticky back and apply the silver transfer foil. If the foil is not available, I’m sure that a shinny silver paint will do. When your head cement is thoroughly dry, use gel type Super glue to attach the head to the hook shank. Attach one side at a time and allow drying time between sides. Align the first side flush with the bottom of the shank and carefully align the front of the belly just behind the hook eye. Take care to align and square the sides so that the cheeks of the mouth are square and equal sized from side to side.
 |
 |
 |
 |
 |
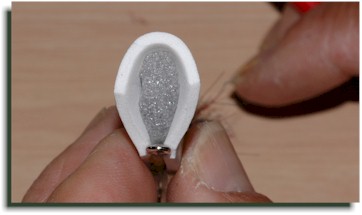 |
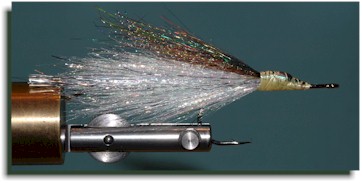
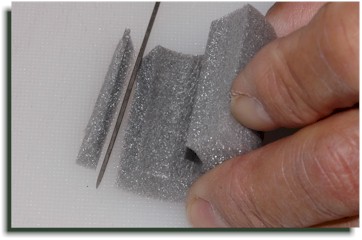
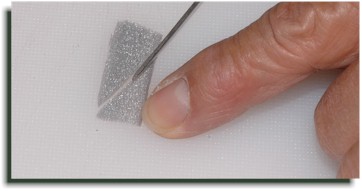
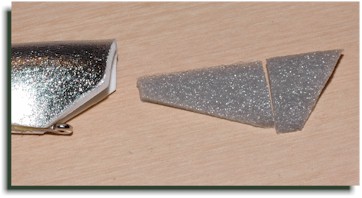
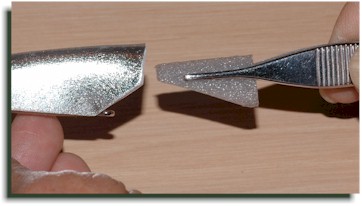
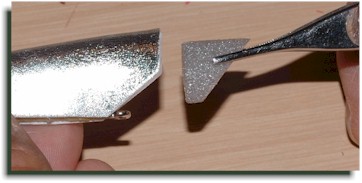
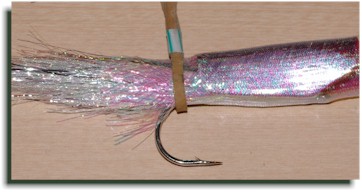
Tying Sequence 3.
Cut the tail and thorax foam inserts from water pipe insulation. (See photos) Insert foam as shown in the photos. Note the foam when view from the end will have the shape of a coffin.
 |
 |
 |
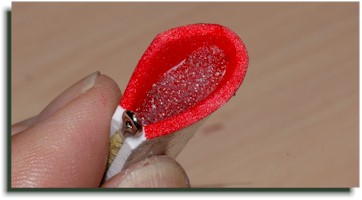 |
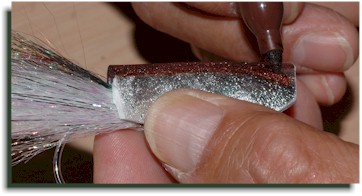
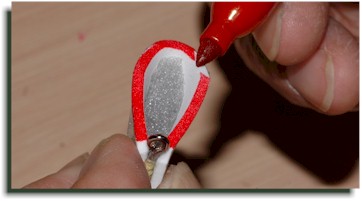
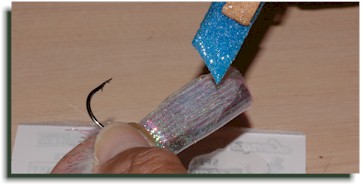
Tying Sequence 4.
Color top of popper head using brown permanent felt marker and color inside the mouth and lips using a red permanent marker.
 |
 |
 |
 |
 |
 |
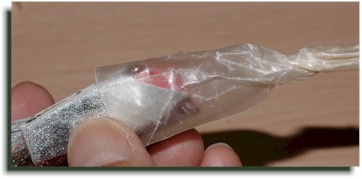
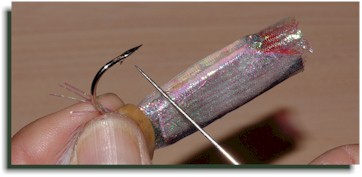
Tying Sequence 5.
Slide a 3 1/2” piece of jumbo pearl Mylar tubing over the body far enough so that the tail end of the Mylar reaches the end of the hook after it is smoothed out. (Hint: Use a 2”x2” square of kitchen waxed paper to roughly form a cone over the front of the head and the eye of the hook to make sliding the Mylar possible. Moistening your fingers and inching just the portion of tubing over the waxed paper makes the sliding easier.) Smooth and snug the Mylar tubing toward the tail. (Hint: See photo and use a rubber band/plastic soda straw, figure 8, noose as shown to squeeze down the circumference of the tubing and hold it snugly against the foam body.) Position the loose loop toward the top of the body. Tighten the noose over the end of the foam body by gripping the loose loop end in your teeth and stretching the rubber band; slide the soda straw band as needed. When the noose is snugly positioned over the end of the foam body, carefully slide it back, off the foam body at least 1/4” toward the tail.
 |
 |
 |
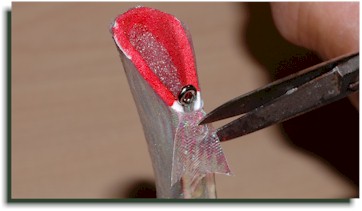 |
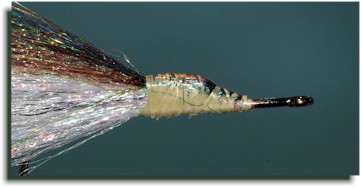
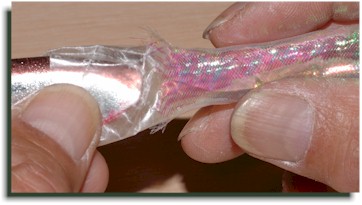
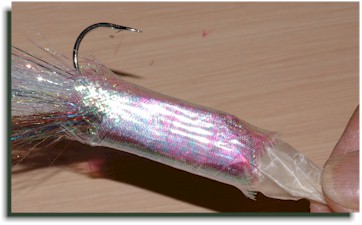
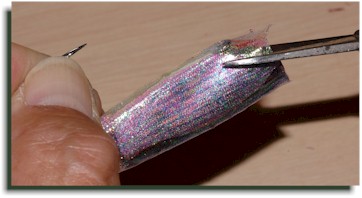
Tying Sequence 6.
Grip the tail, Mylar tubing, rubber band and hook bend in one hand (do not let go.) With the other hand, apply the first of two thin coats of 5 minute epoxy to the Mylar body tubing. Brush forward in one direction from just in front of the rubber band to cover the entire head (try not to get any epoxy on the rubber band.) Brush epoxy into the Mylar to saturate the belly area, bonding the Mylar to the hook shank. Also work in some epoxy very close to the rubber band, well over the end of the foam in the body. (Hint: a very useful and cheap brush can be made of a ground down wooden clothes pin and throw away brush heads cut from a stiff closed-cell foam. I like to use brush heads about 1 1/2” long, 1/2” wide and 1/4” thick with a chisel point cut at an angle cut from an old blue camping ground mat. This material has just the right stiffness to work the epoxy and the angled point allows me to brush in the concave mouth and around the hook eye.) Before the epoxy sets up use an old bodkin to squeegee excess epoxy from the tail towards the head, smoothing the tubing as you go. (Hint: a lint free rag spread across my right knee is handy to wipe the bodkin free of epoxy as I work. After the epoxy has hardened on my bodkin, I easily scrape it clean with a small knife blade.)
When the epoxy is partially set up, loosen the rubber band noose and remove it. This is the time to smooth out any minor lumps and do your final shaping, moistened fingers and smooth long fingernails work well. Before the epoxy is totally hardened, use a medium heavy pair of scissors to first trim off the excess Mylar tubing with a vertical cut around the front of the head and then cut the angled edges on both sides from the front to as far past the hook eye as you can easily reach with the scissors point. Lift the flap of excess Mylar and clip it off as close as possible.
 |
 |
 |
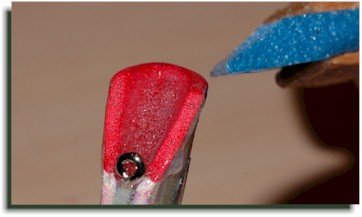 |
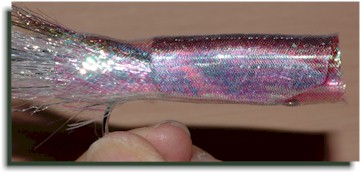
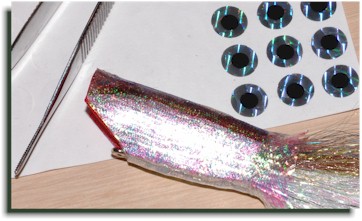
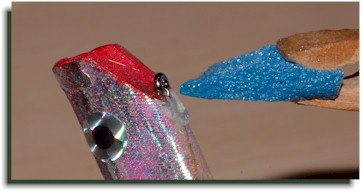
Tying Sequence 7.
Apply the stick on eyes. Use the black Sharpie felt marker to make the dot. First epoxy the most important areas. Brush in and fill as much of the pocket in the chin area as possible just behind the hook eye. Brush in and heavily coat the red mouth area. Be careful to seal around the hook eye and coat the lip edges. Brush on the final thin coat of epoxy. As you evenly brush on the smooth final coat, keep turning the fly so that cupped front face is uniform and heavily coated.

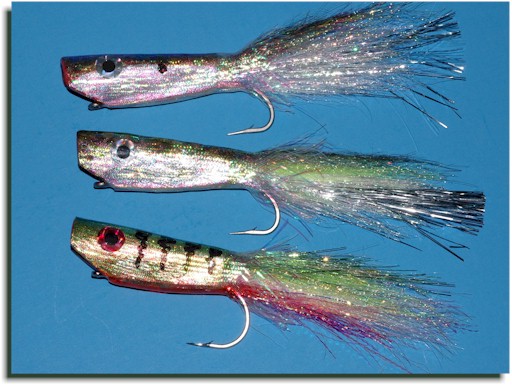
You’re finished! I hope you were able to follow my instructions and you now know how to tie a fly that will give you a bit of satisfaction and a lot of big fish! Below are a couple of productive variations of the sardina pattern and a peacock bass version.